Artistic Printing Inspiration in Illustrator and Photoshop

This morning I was tidying up my apartment then I decided to organize my books, I didn't bring many books to San Francisco, only the ones I really like, and among them there is The Handy Book of Artistic Printing: Collection of Letterpress Examples with Specimens of Type, Ornament, Corner Fills, Borders, Twisters, Wrinklers, and other Freaks of Fancy . I love this book because it's full of letterpress examples, like type, ornaments, corner fills borders and much more. So after a few minutes checking the book out I decided to design something using Illustrator and Photoshop inspired by some of the artworks I saw.
This tutorial I will show you how to create an vintage style letter press effect using Illustrator and Photoshop. The process is quite simple but it's a good exercise and will definitely broad your skill set.
Step 1
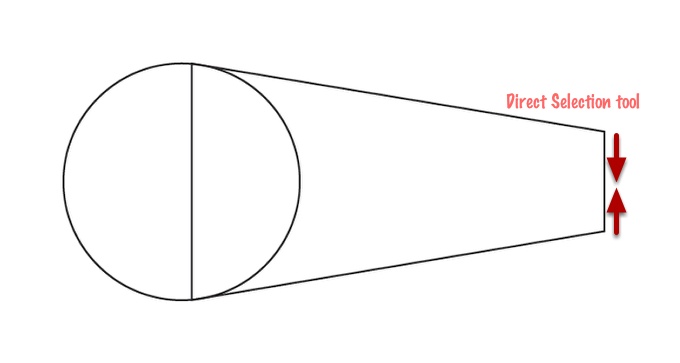
Open Illustrator and create a new document, the size is not important we will just create the basic shapes and then in Photoshop we will apply the effects to give it the nice letter press style.So in Illustrator start off by creating a circle and a rectangle, then with the Direct Selection Tool change the rectangle so the right side is smaller thant the left.
Step 2
Select both objects and go to Object>Path>Offset Path. Use 4mm for the Offset.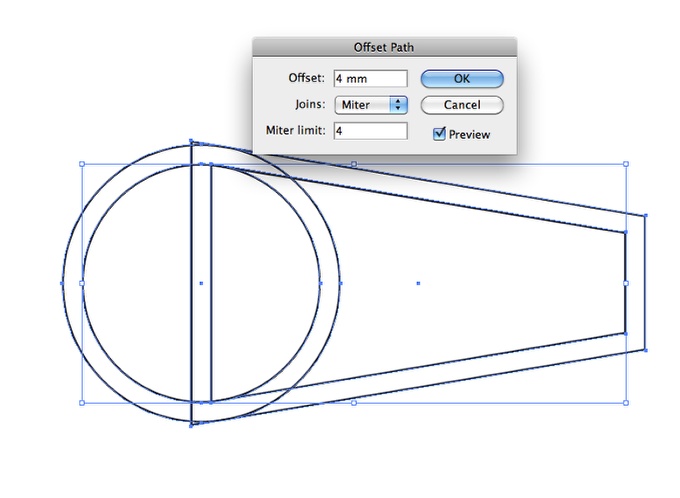
Step 3
For the circle use 3pt for the stroke of the inner circle, and for the rectangle use 4pt for the inner object. After that you apply the offset command in both objects but using 2mm. The idea is create another element between them. So for the rectangle one apply a dashed stroke by selecting the option Dashed Line. Use 1pt for the dash and 5pt for the gap. Also make sure the Cap and the Corner are with the Rounded option.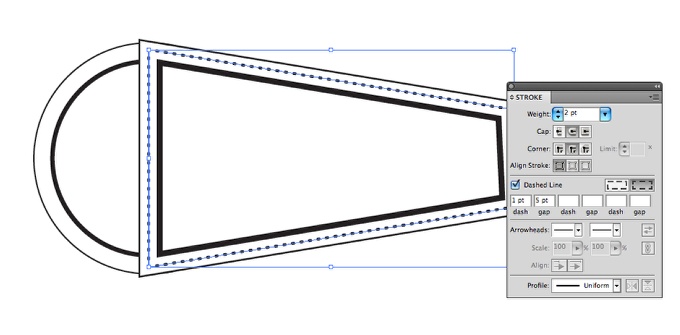
Step 4
Repeat the same thing for the circle but then use the Square option for Cap and Corner.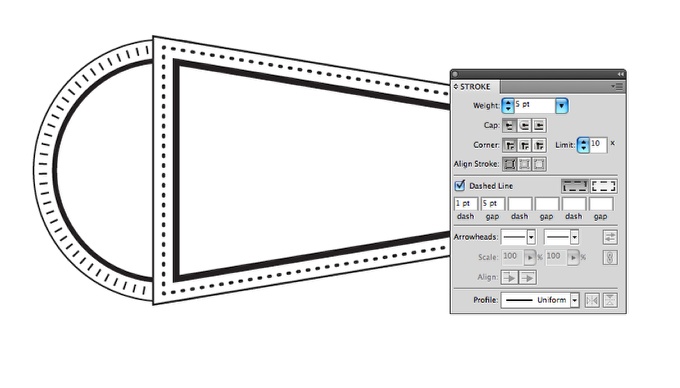
Step 5
Time to fill out the objects. Illustrator comes with some really nice Swatch Libraries, go to Window>Swatch Library>Patterns>Basic Graphics>Basic LInes. Select the last one that is vertical lines. Fill the circle with that one.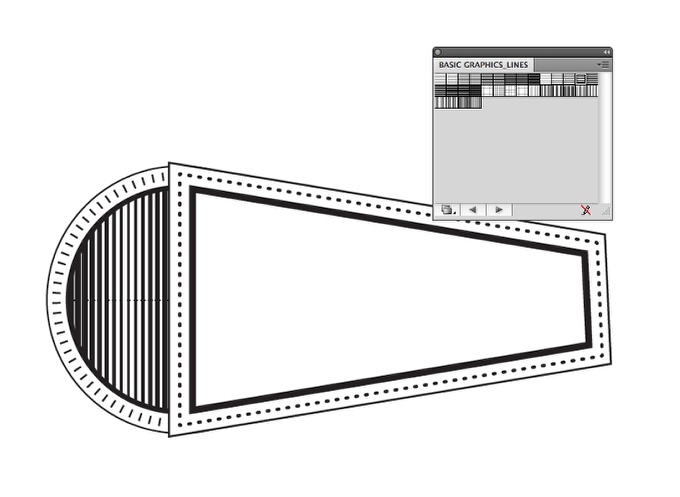
Step 6
For the modified rectangle using the Line Segment Tool (/) create 2 lines like the image below.
Step 7
With the Blend Tool (W) select one then the other line to create the blend effect. After that double click on the blend tool icon to open the Blend Options. Change the Spacing to Specified Steps and use 69 stepts.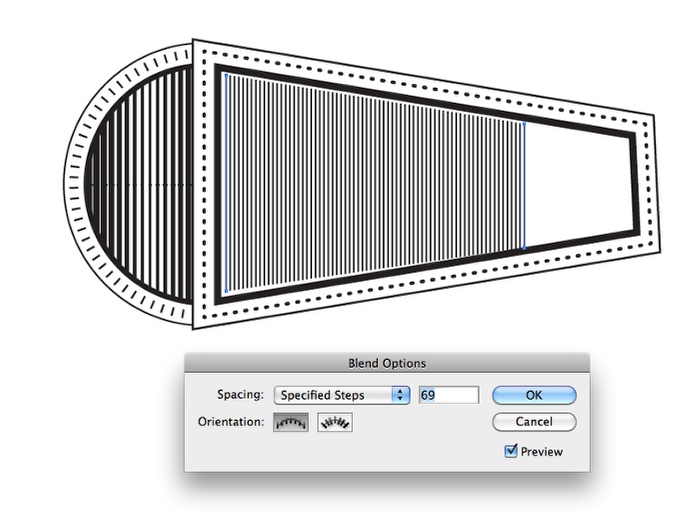
Step 8
Duplicate both objects and rotate them. After that add a circle with and repeat the same offset effect we created in the previous steps. In the center add a sqare and rotate it 45º. Repeat the same offset effects but fill the object in te center in black. Also notice that the big circle has a dotted stroke, that one was done by using 7pt for the weight, 1pt for the dash and 10pt for the gap with rounded cap.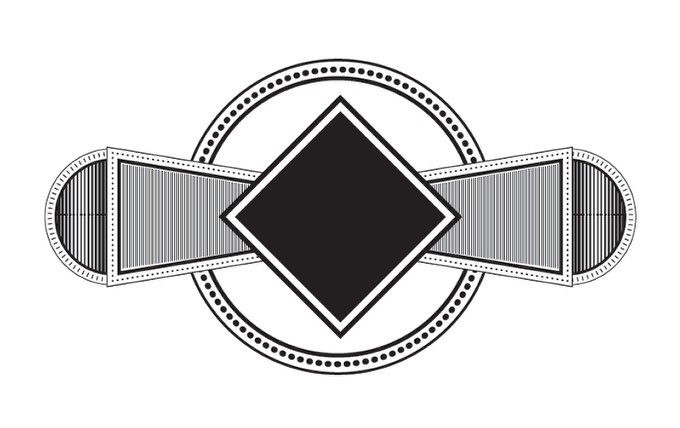
Step 9
For the big circle fill let's use the Blend Tool once again. So copy the circle (Command + C) and paste in place (Command +F), then resize it a little bit (1). Copy and paste in place again and make the new copy much smaller (2).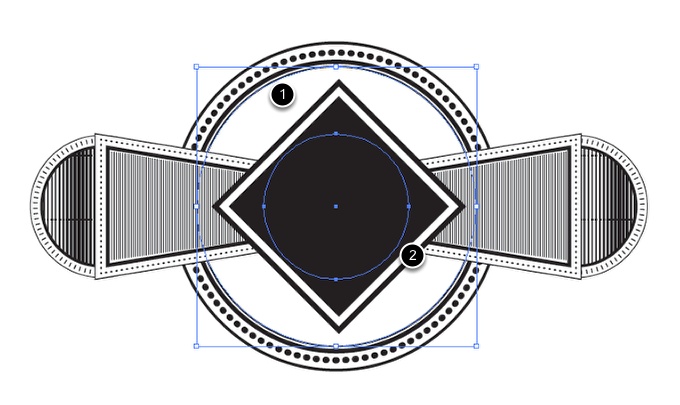
Step 10
Apply the Blend Tool (w) by clicking on the 2 circles. Then double click on the blend object to edit it. Use Specified Steps with 30 Steps. Also I used 2pt for the Stroke weight.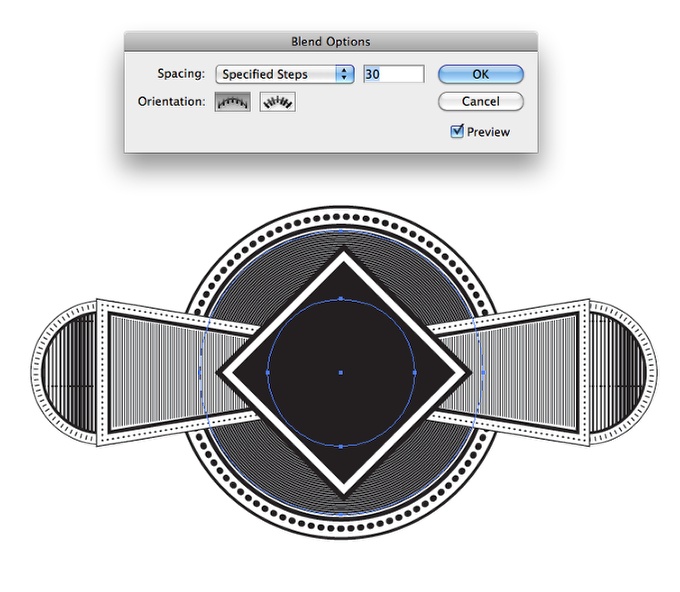
Step 11
Here I just added the Abduzeedo Symbol and the word Abduzeedo using the Type on Path Tool, in which I duplicated the big circle to use as the reference path for the effect.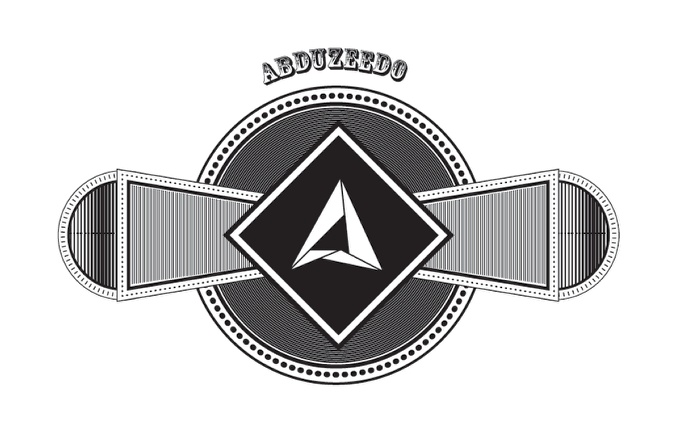
Step 12
Go to Windown>Swatch Libraries>Patterns>Basic Graphics>Basic Graphics_Textures. After that create a rectangle and then fill it with one of the textures. The Illustrator part is done, now it's time to Photoshop.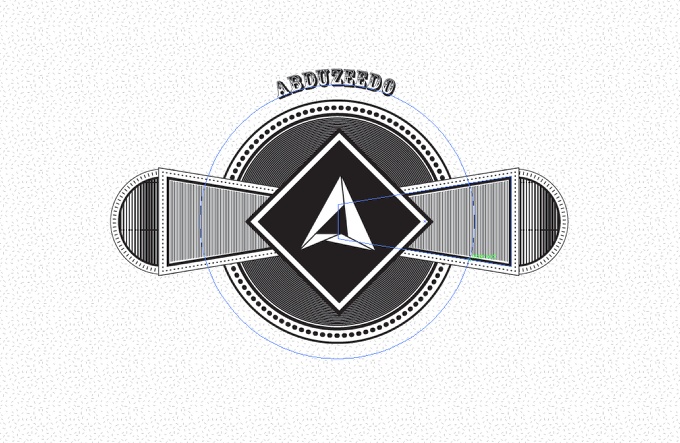
Step 13
Open Photoshop and the first thing to do is import a texture, old paper texture. The one I am using is from Shutterstock and you can get it at http://www.shutterstock.com/pic-43075990/stock-photo-the-old-shabby-pape...
Step 14
Copy the rectangle with the texture from Illustrator and paste in Photoshop. Then in Photoshop change the layer's Blend Mode to Color Burn.
Step 15
Now copy the whole symbol without the Abduzeedo word in Illustrator and paste it in Photoshop. Make sure that the background of the symbol is white.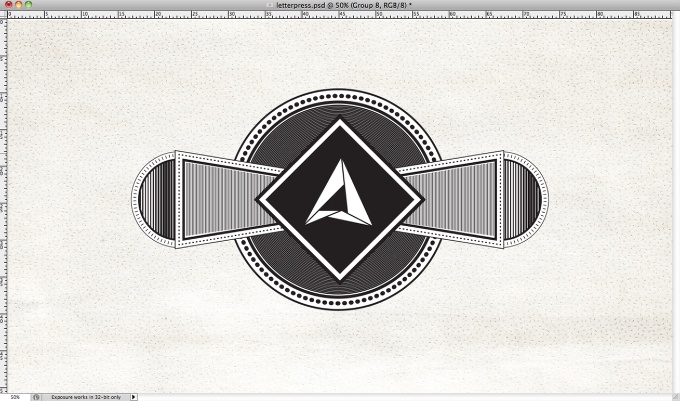
Step 16
Duplicate the symbol 4 times moving it a few pixels up for each copy in order to create a 3D effect.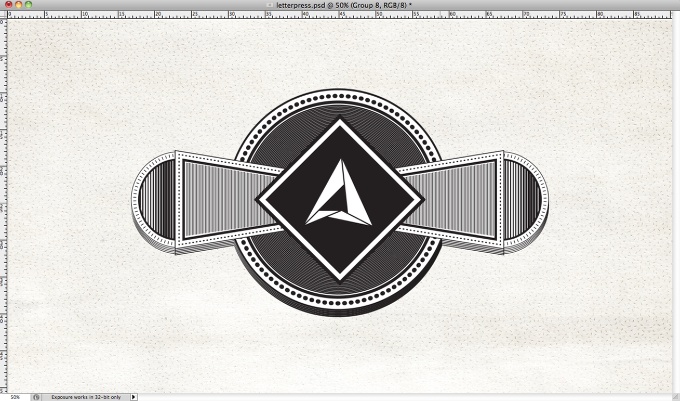
Step 17
Go to Layer>New Adjustment Layer>Hue and Saturation. Use 40 for the Hue, 40 for the Saturation and 14 for the Lightness. Also make sure that the adjustment layer is on top of the other layers.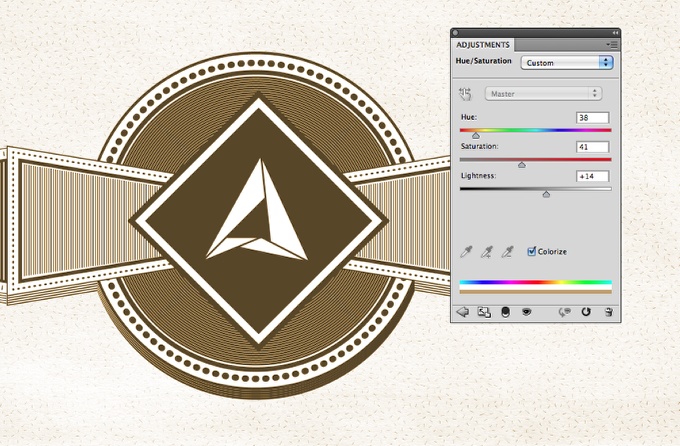
Step 18
Go to Layer>New Adjustment Layer>Levels. Use 0, 0.55 and 255 for the Input levels, the change the black output to 73.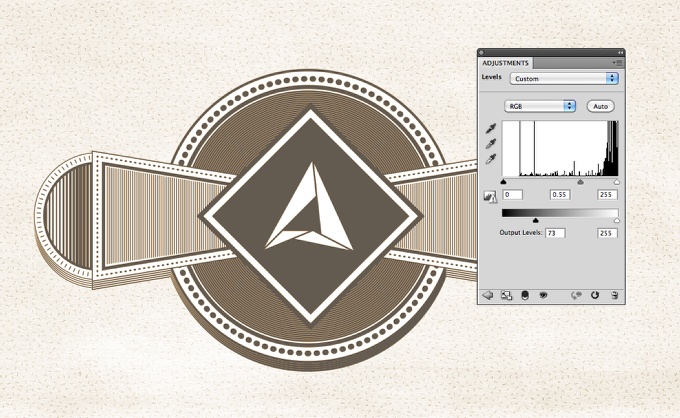
Step 19
Here is an example of the final colors you have to have in this point. Notice I also added another text at the bottom.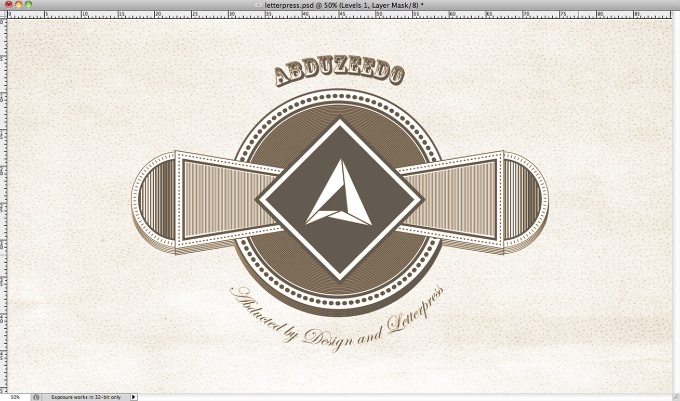
Step 20
With the Magic Wand Tool (W) change the tolerance to 3 then select a part of the old paper texture. After that go to Select>Similar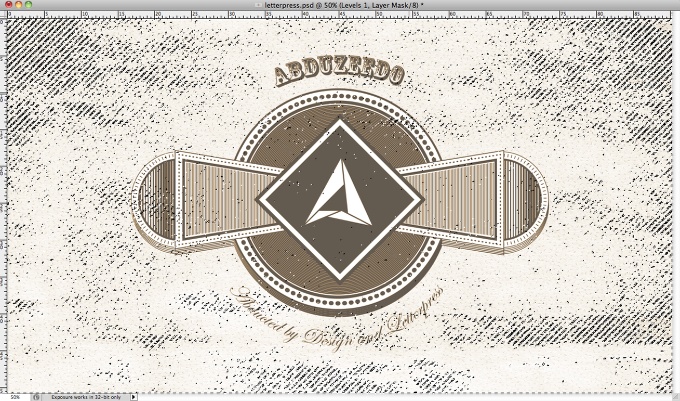
Conclusion
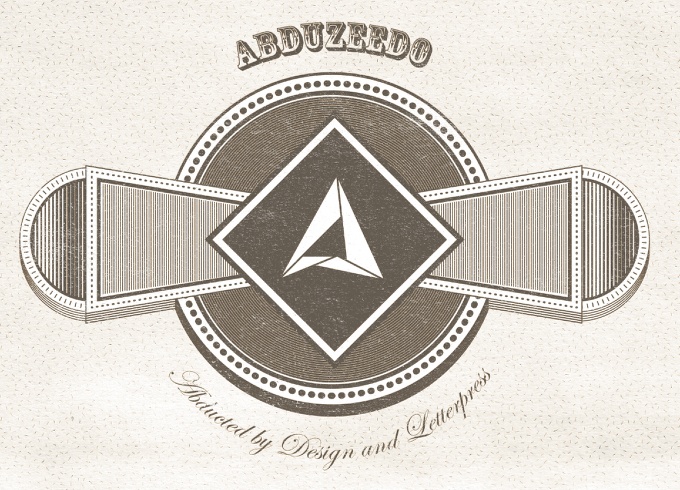
Group all objects (text, and shapes) into a folder then with the marquee selection still active go to Layer>Layer Mask>Hide Selection. This mask will make your effect looks much more realistic. Also you can change the blend modes to linear color burn or even color burn to make it look like super old and burned, however you would have to duplicate it a few times to make it dark enough.Anyway, this tutorial was just an exercise I decided to do while checking an amazing book called The Handy Book of Artistic Printing. I love finding inspiration from books and trying to recreate images I see and like in order to improve my skills.

No comments:
Post a Comment