Flashing Design in Photoshop by Mike Speero

The tutorial of this week is very special, it's from Mike Speero, a graphic designer from Gothenburg, Sweden. Mike has been featured in several books, magazines, done interviews, had a poster up on a fancy Italian galleria and soon he will be selling skateboards as well.
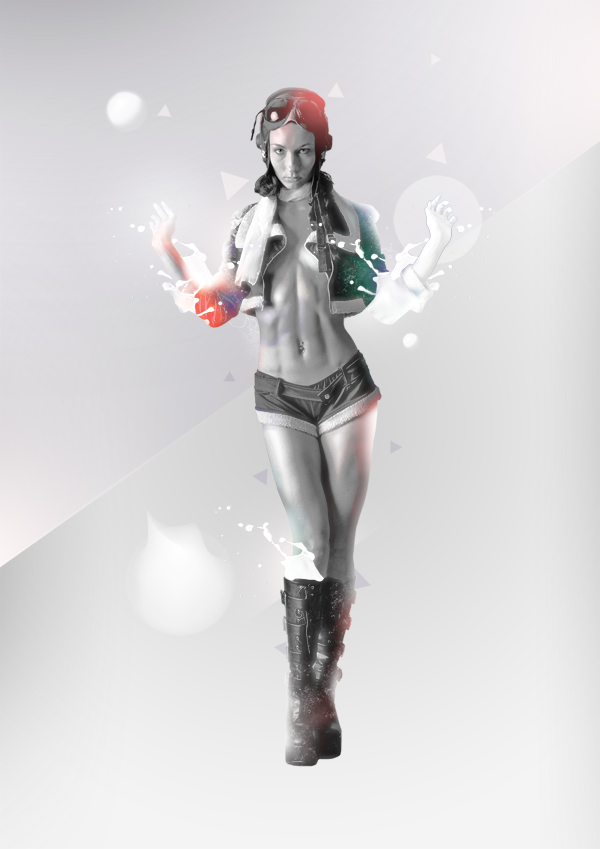
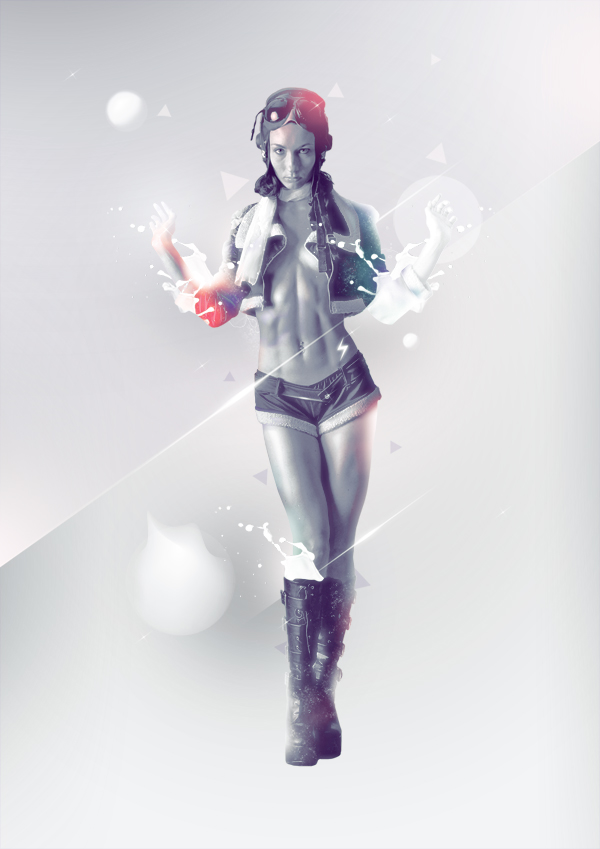
So in this tutorial he will show you how he created one the "Flashing" design, one of his works from his portfolio which in he mixes a photo of girl with splashes of milk and light effects to create a beautiful artowork.. We also highly recommend that you visit Mike's website and check out his portfolio, it's really cool.Step 1
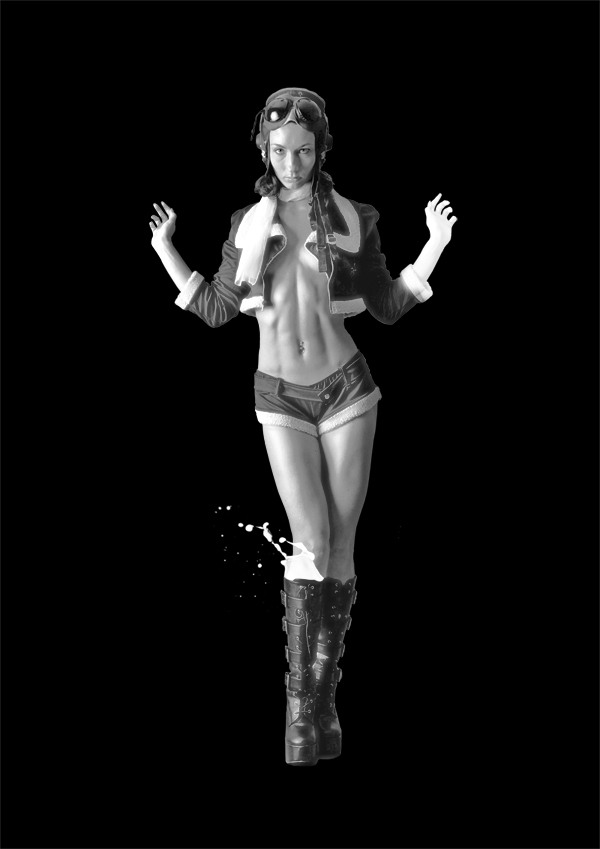
Mask out the girl. Push the button in the circle, so you get the white field in your layer next to your image. Then use pen-tool or a brush with black color to erase the background. (Make sure you draw on the white field and not the picture itself)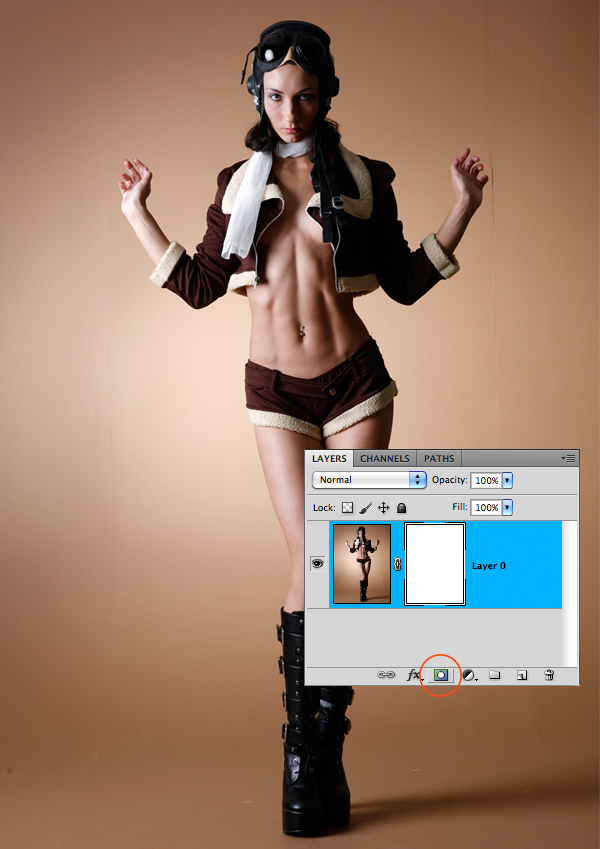
Step 2
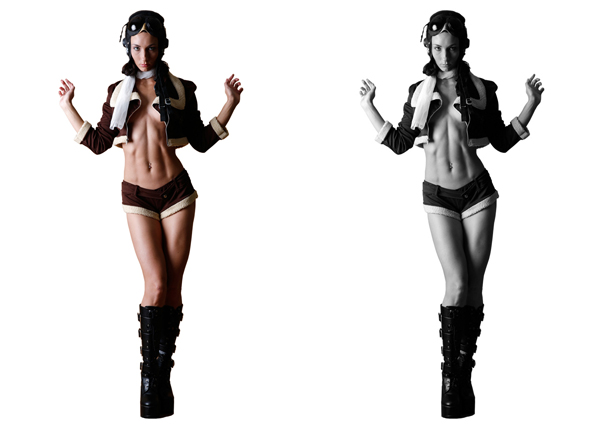
Make the model grey by going to Image>Adjustments>Hue/saturation. Drag the middle anchor to the grey field. An easier way is to hit cmd+shift+U.Create a new white layer and place it in the bottom. Layer>New fill layer>Solid color.
Then size your model up or down. In this case, I shrunk her a little bit to fit the picture better. Use cmd+T to change the size. (When in use, you can always experiment by holding down shift, ctrl and cmd sometimes to get different results.)
Step 3
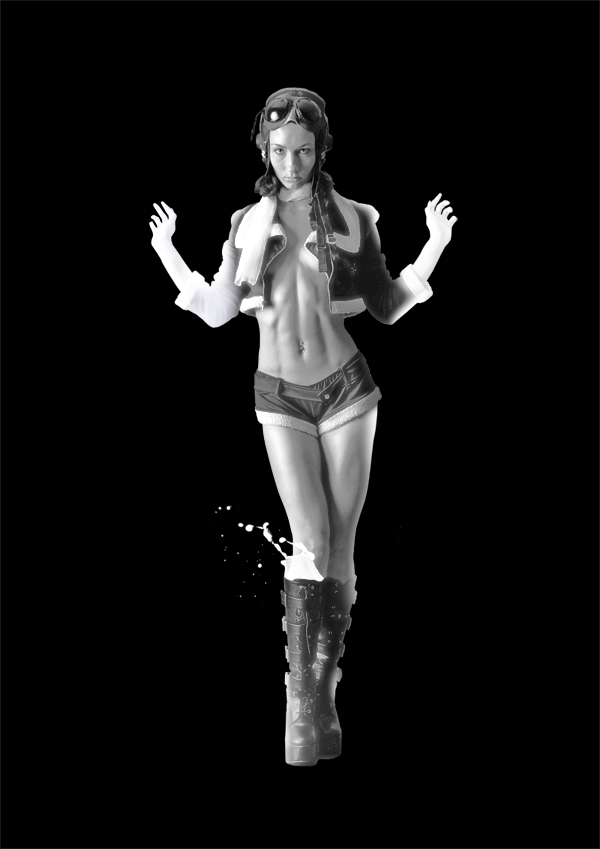
Time to duplicate. Go to Layer>Duplicate Layer or press cmd+J. Then go to Layer>Create Clipping Mask. The top layer should now point down to the layer beneath.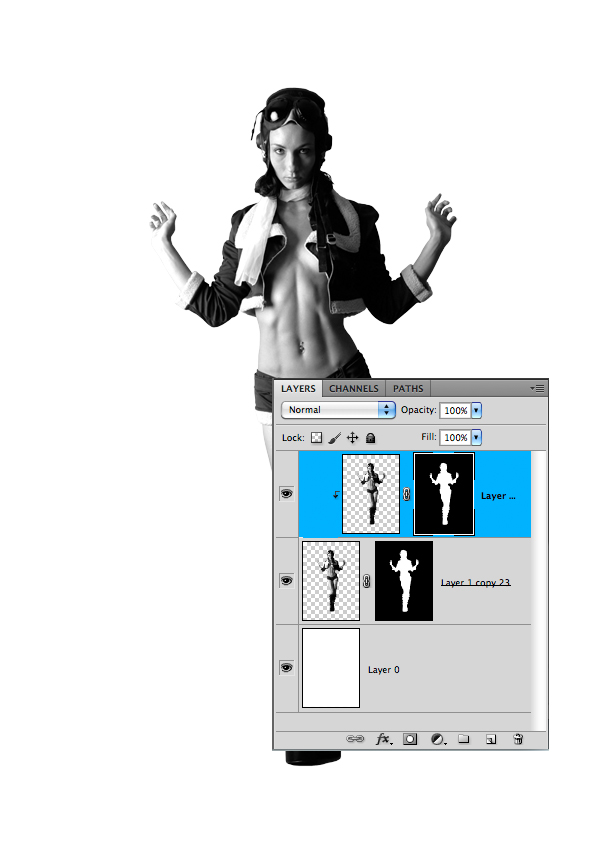
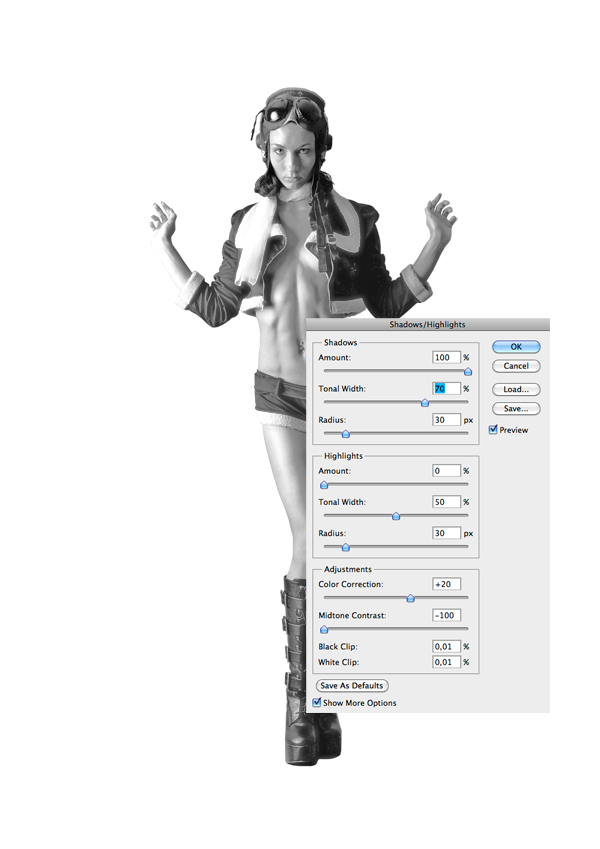
Step 4
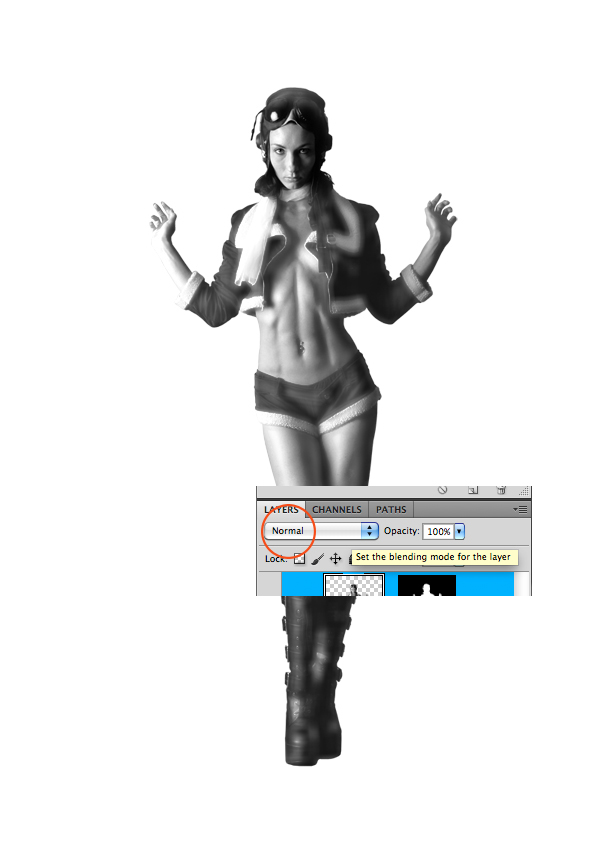
This treatment is for the top layer. Image>Adjustments>Shadow Highlights. Click in the box "show more options". Then change Shadows: Amount to 100 and Adjustments: Midtone Contrast to -100.Step 5
Filter>Blur>Gaussian Blur. Approx 3.0 blur. Then in Blending Mode change the status from Normal to Lighten. Next to the blending mode there's the Opacity box. Make sure it's says 70%.Also, in the clipping mask field, paint over the face so it's not that blurry.
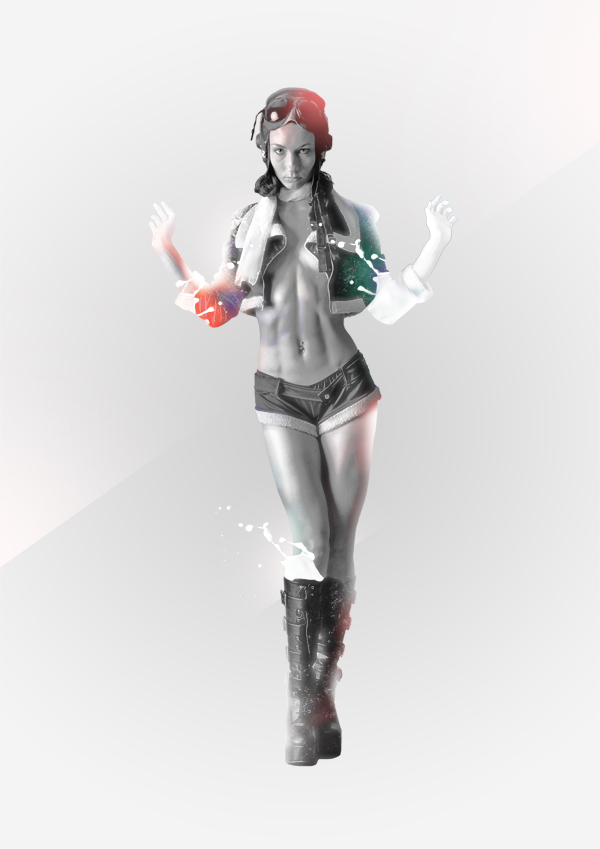
If you did everything right, it should look something like the picture below.
Step 6
Duplicate the bottom layer and place it on the top. Then place it in the clipping mask.Then for the top layer Image>Adjustments>Shadow/Highlights. See below for the numbers. And last Blending Mode>Lighten.
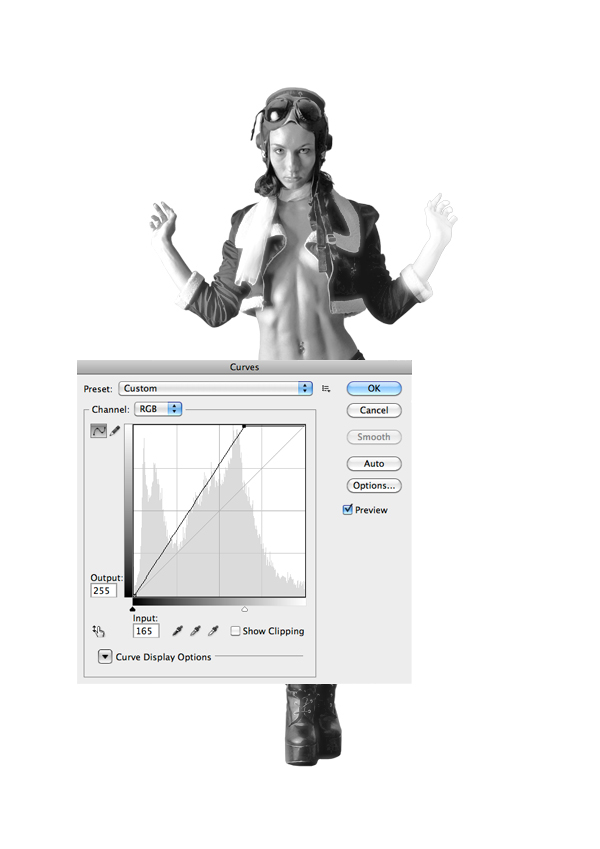
Step 7
Make a new duplicate from the top layer. This time only use the right hand. Mask away the rest. Then go to Image>Adjustments>Curves. If it's not that white as you wanted it to be, go to Blending Mode and change to Lighten. Duplicate the hand. Mark both hand layers and merge them by Layers>Merge Layers.Keep the layer in the clipping mask.
Step 8
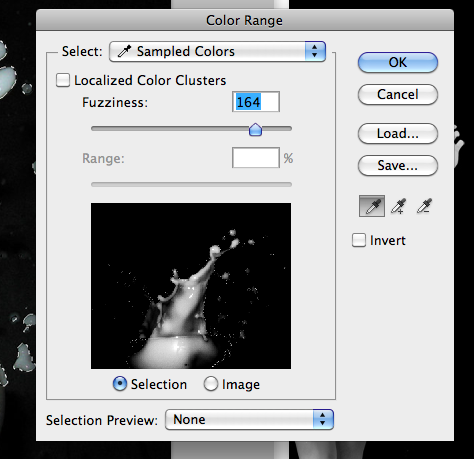
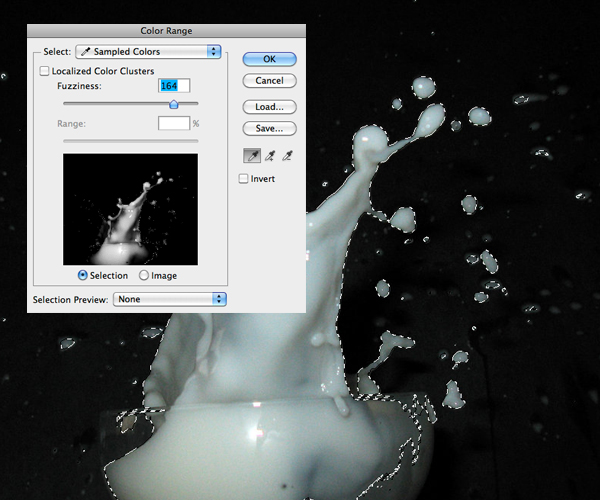
Make the background Black. Double click on the layer and go to Color Overlay>Double Click on the red rectangle and choose the color black.Time for some splashes. Open up your splash picture in a separate window. Then go to Select>Color Range. Get as much of the content you want and press OK. In many cases the selection is for the things you don't want. To fix that go to Select>Inverse. Now copy the splash into the window we work in.
Make the splash grey by cmd+shift+U. Repeat Step 7 to make it more white.
Step 9
I never use the eraser, only the mask. Use the mask to fix with the splash so it fits the boot. This layer should be on top and not be placed into the model mask.Next. Play around with a spray brush. Do however you want here. Change the opacity on some for a good mix of light. Add some special brushes as well. These should be in the mask.
Keep in mind: The 2 model layers in the mask should always be on the top. The things we put in there from now on, shall be placed in the bottom.

Step 10
Now we add the splashes again. Bring in new ones or just duplicate the one from before.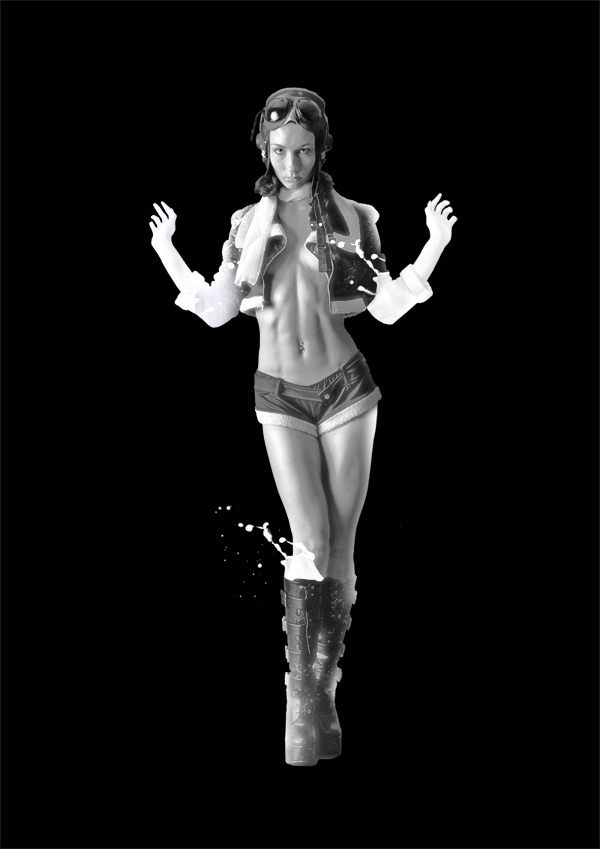
Step 11
Use the spray brush to paint in some colors. One layer for each color.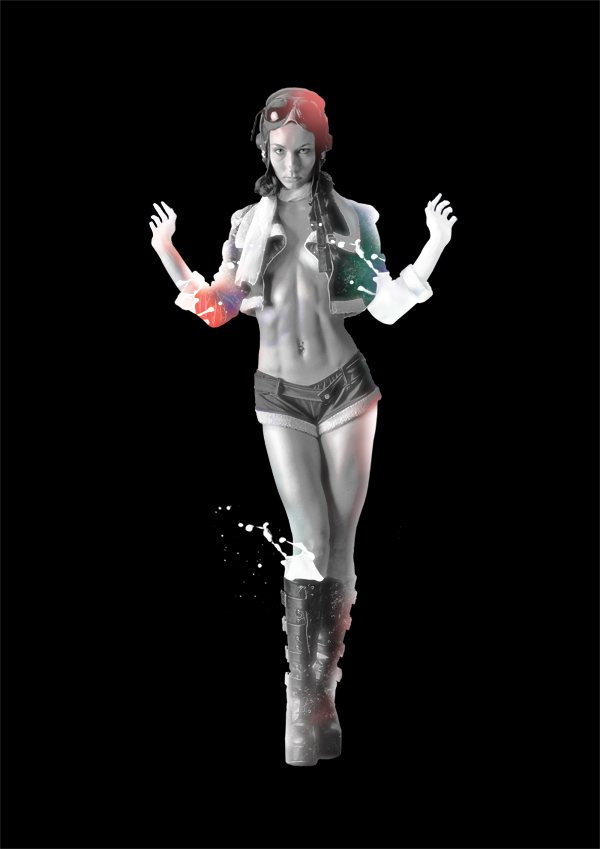
Step 12
Time to fix with the background. Create a new layer above the background layer. Use the Lasso-Tool and draw a triangle shaped form. When it's active, use a brush to paint outside the selected area to get this cool effect.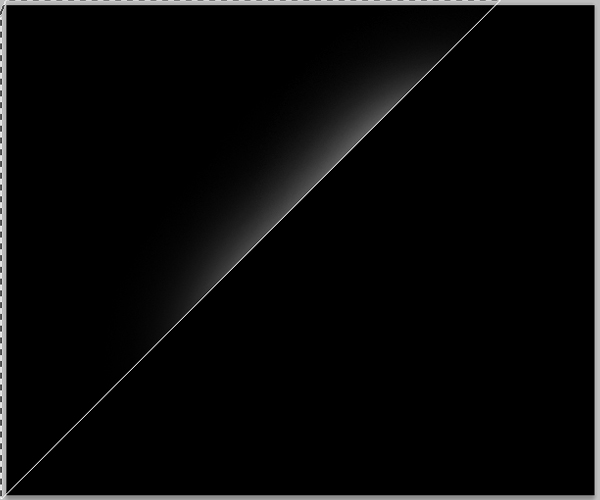

Step 13
Back to a white background again. But with a little extra grey in the middle. Double-click on the layer and follow the picture below.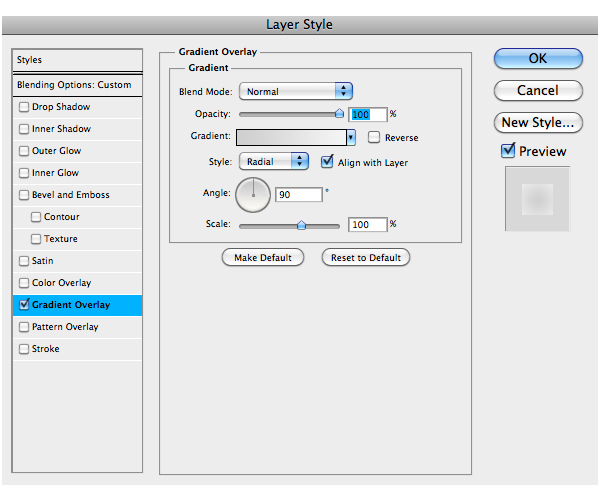
Step 14
More splashes, but this time, put them behind the model and not in the mask.Make some Triangles and Circles. I used purple for the triangles and white for the circles. The Opacity is lowered on both symbols. You can find them in your shape-tool options palette.
Create a shape with Lasso-tool that is in line with the previous lines in the background and move it up a little. Then you get an extra effect. I used purple color and lowered the opacity to 5%.

Step 15
Throw in some balls or whatever you like. I made mine in Illustrator and added some effects with the mesh tool there. Then I pasted them into photoshop and in Blending Mode changed them to Screen.Use the brush to paint some shadows in the back. You can also use white to mix it up.
Step 16
Light effects. I'm gonna show you how to do them. This is a quick lecture. You gonna have to practice a little to master it.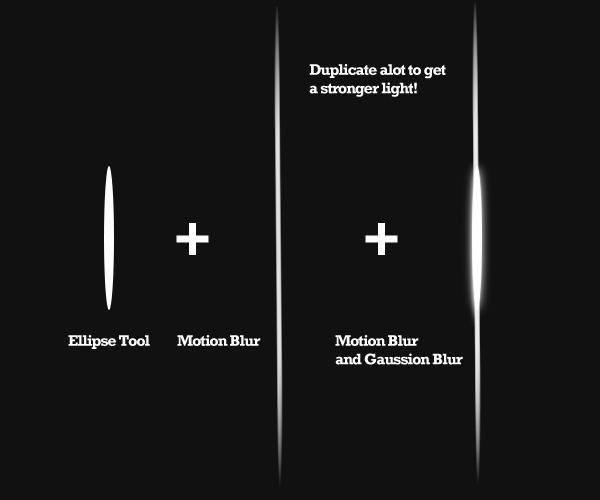
Step 17
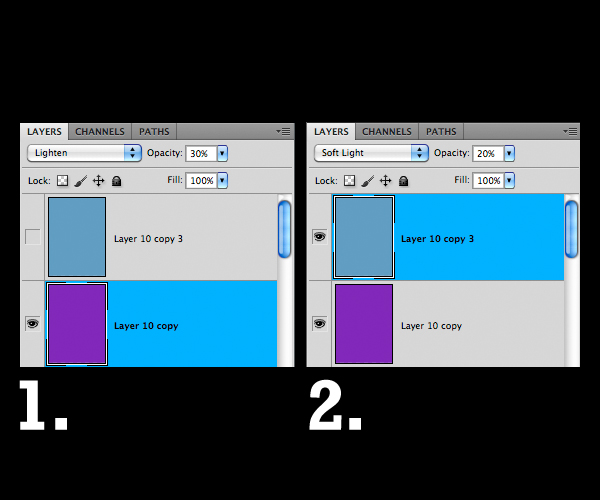
Make some bling bling stars and brush up the white parts so they really shine. Just some simple finishing stuff.Create 2 new layers and place them on the very top and do like this:
Step 18
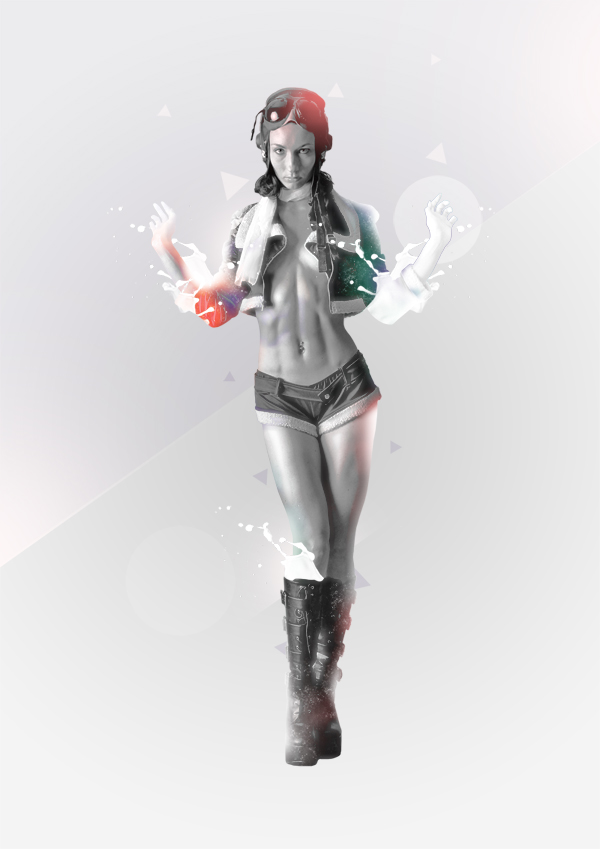
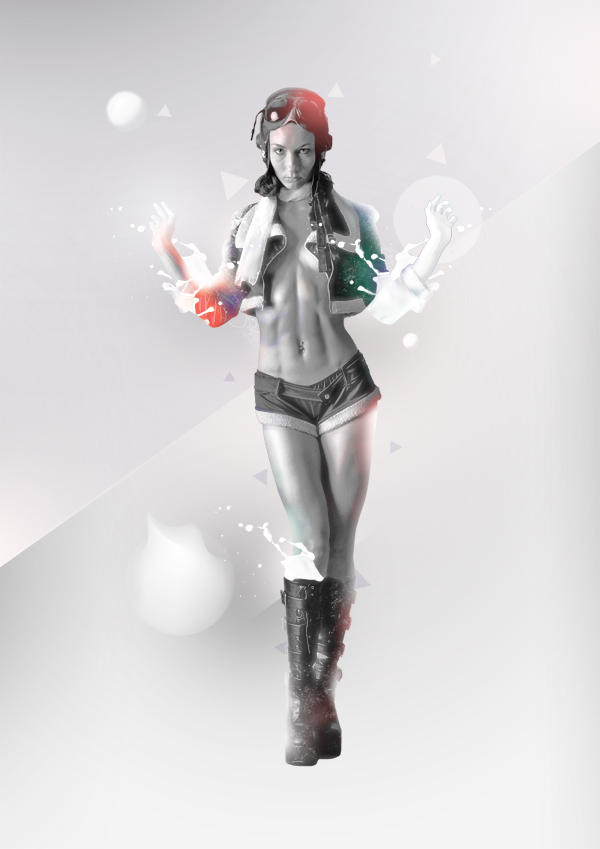
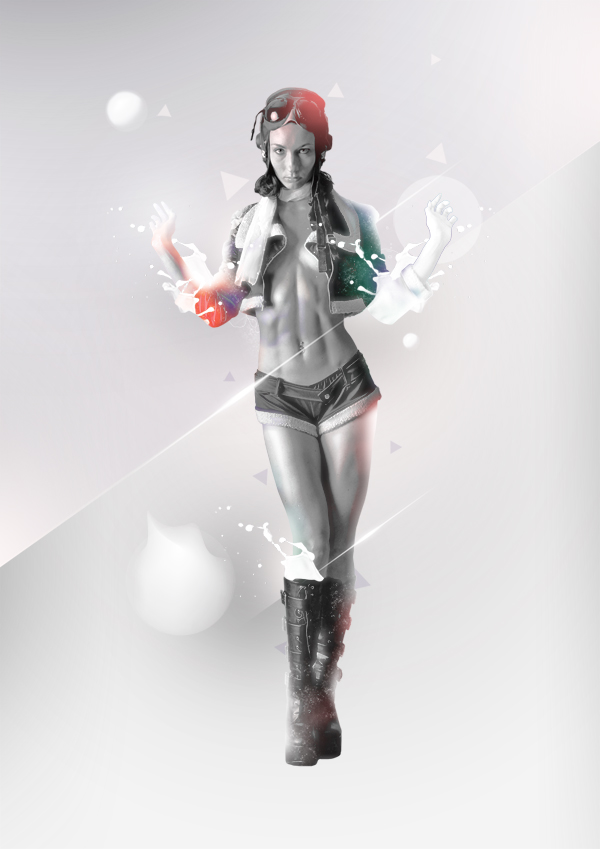
Check over your image for weird stuff. The hand looks a little strange so far. Create a new layer and place it in the model mask. Pick a white brush to paint the edges of the hand so it looks sweet.And here's the final picture!

No comments:
Post a Comment